
International Bank
International Bank transfers allow for secure cross-border payments directly to beneficiaries' bank accounts in various countries. This method supports multiple currencies and is suitable for global transactions, though processing times can vary depending on the destination country and bank.
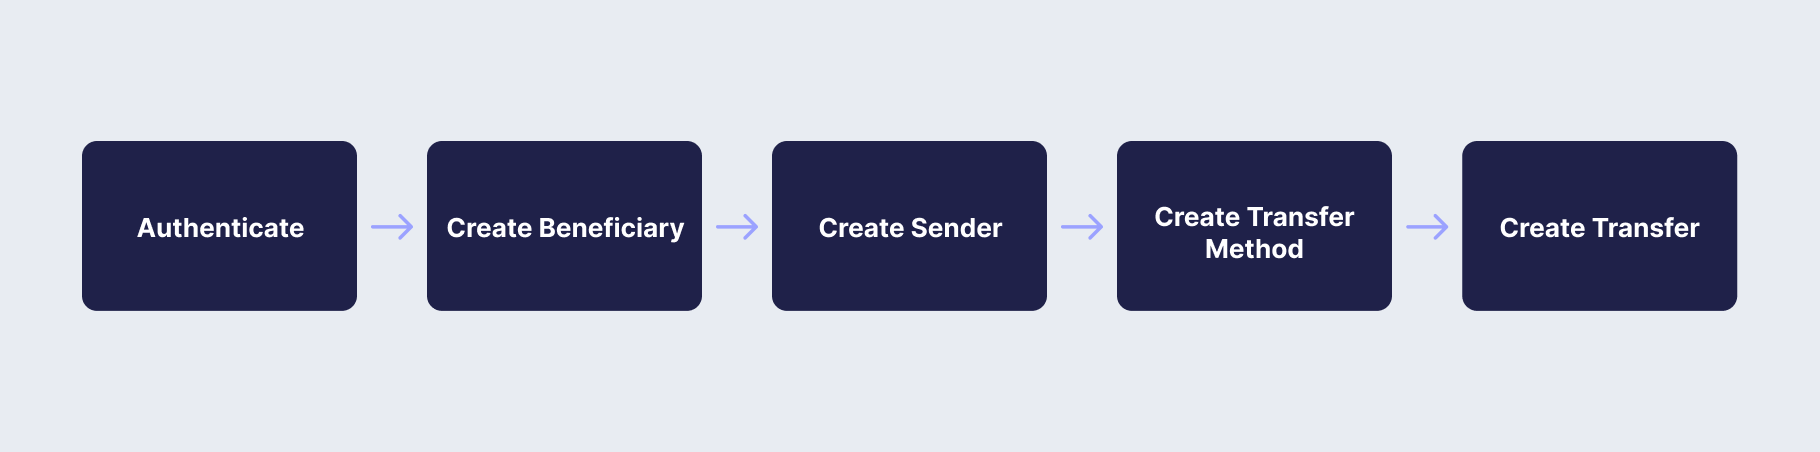
The usual workflow for a Full API Integration involves the following steps:
Step 1: Authenticate: Obtain an API token by validating your credentials.
Step 2: Create Beneficiary: Create and manage beneficiary's accounts using API calls.
Step 3: Create a Sender: Identify who is originating the payout. Every transfer requires a sender.
Step 4: Create Transfer Method: Add and manage transfer methods for your beneficiaries.
Step 5: Create Transfer: Execute and manage transfers between accounts.
API Endpoints Used
This guide will demonstrate step-by-step instructions using the API integration method. In this guide, you will use the following API endpoints:
Below, you will go through the necessary API calls to achieve the steps above within the i-payout system.
Step 1: Authenticate
To start using i-payout solutions, you will need to authenticate with your API Token. Refer to the Get a Token guide to learn how to:
Step 2: Create Beneficiary
A beneficiary is an individual designated to receive funds or payments through the i-payout system. To create a beneficiary, you will need to provide detailed information about the individual, such as their name, address, and payment details.
Use the Create Beneficiary endpoint to create a new beneficiary. The request should include all necessary details about the beneficiary in the request body and, as shown in Step 1, include the authentication to access the i-payout API. Below, you will find an example request to create a new beneficiary:
curl --request POST \
     --url "https://merchantapi.testewallet.com/api/v1/beneficiaries" \
     --header 'Authorization: Bearer <YOUR_API_TOKEN>' \
     --header 'X-MerchantId: <YOUR_MERCHANT_ID>' \
     --header 'accept: application/json' \
     --header 'content-type: application/json' \
     --data '{
        "username": "john_doe",
        "firstName": "John",
        "lastName": "Doe",
        "emailAddress": "[email protected]"
    }'
{
"data": {
"beneficiaryToken": "e0e4764b-9619-4deb-95c4-108ce9f0fe04"
},
"isSuccess": true,
"message": "Customer created successfully",
"statusCode": "NO_ERROR",
"logIdentifier": "497b73624c0d47bfb0abf58df5dd99ca"
}Step 3: Create a Sender
A sender identifies who is originating the payout. Every transfer requires a sender attached — only company senders are supported at this time, so companyName is required even if the beneficiary is an individual.
Use the Create Sender endpoint to create a new sender:
curl --request POST \
     --url "https://merchantapi.testewallet.com/api/v1/beneficiaries/sender" \
     --header 'Authorization: Bearer <YOUR_API_TOKEN>' \
     --header 'X-MerchantId: <YOUR_MERCHANT_ID>' \
     --header 'accept: application/json' \
     --header 'content-type: application/json' \
     --data '{
        "senderID": "acme_corp",
        "companyName": "Acme Corp",
        "emailAddress": "[email protected]",
        "address1": "456 Market St",
        "country": "US"
    }'
{
"isSuccess": true,
"message": "Sender created successfully",
"statusCode": "NO_ERROR",
"logIdentifier": "789ghi012jkl",
"data": {
"senderToken": "f1e2d3c4-b5a6-7890-abcd-ef1234567890"
}
}
Already Have a Beneficiary?You can also use an existing beneficiary's token as the sender token instead of creating a separate sender — they're the same underlying object, just created through different endpoints.
Step 4: Create Transfer Method
To manage how funds are transferred to beneficiaries, you need to create a transfer method. To add an international bank account transfer method, use the Add Bank Account endpoint. This lets you specify the beneficiary's bank account details, ensuring funds are correctly directed to their bank account. Below, you will find an example request to add a bank account:
curl --request POST \
     --url "https://merchantapi.testewallet.com/api/v1/transfer-methods/beneficiaries/<BENEFICIARY_TOKEN_FROM_STEP_2>/bank-accounts" \
     --header 'Authorization: Bearer <YOUR_API_TOKEN>' \
     --header 'X-MerchantId: <YOUR_MERCHANT_ID>' \
     --header 'accept: application/json' \
     --header 'content-type: application/json' \
     --data '{
        "accountNickName": "John UK Account",
        "accountCurrency": "GBP",
        "accountNumber": "987654321",
        "accountType1": "personal",
        "accountType2": "checking",
        "bankName": "HSBC",
        "bankCode": "40-30-20",
        "bankCountry": "GB",
        "swiftCode": "HBUKGB4B",
        "branchAddress": "1 Queens Road, Central London",
        "beneficiaryFirstName": "John",
        "beneficiaryLastName": "Doe",
        "beneficiaryCountry": "GB",
        "beneficiaryAddress1": "123 King St",
        "beneficiaryState": "England",
        "beneficiaryCity": "London",
        "beneficiaryZipCode": "SW1A 1AA"
    }'
{
"isSuccess": true,
"message": "Bank account added successfully",
"statusCode": "NO_ERROR",
"logIdentifier": "def456ghi789",
"data": {
"token": "bankAcc123Token",
"isDocumentVerificationRequired": false
}
}Step 5: Create Transfer
With the new beneficiaries created in the system, you can now pay them. This is done by transferring funds to them. The Create Transfer endpoint will be used to make the transfer from you to your beneficiary by linking the transfer with the beneficiaryToken created in Step 2 and the senderToken created in Step 3.
To transfer via International Bank, the destinationType should be Bank. Specify sourceCurrency and destinationCurrency to indicate the currency pair, the exchange rate is applied automatically. Below, you will find an example request to create a new transfer:
curl --request POST \
     --url "https://merchantapi.testewallet.com/api/v1/transfers" \
     --header 'Authorization: Bearer <YOUR_API_TOKEN>' \
     --header 'X-MerchantId: <YOUR_MERCHANT_ID>' \
     --header "accept: application/json" \
     --header "Content-Type: application/json" \
     --data '{
         "merchantTransactionId": "TX123456",
         "beneficiaryToken": "<beneficiaryToken_from_step_2>",
         "senderToken": "<senderToken_from_step_3>",
         "autoApprove": true,
         "comments": "Payment for services",
         "dateExpire": "2024-12-31T23:59:59.999Z",
         "sourceAmount": 100.00,
         "sourceCurrency": "USD",
         "destinationAmount": 100.00,
         "destinationCurrency": "GBP",
         "destinationType": "Bank",
         "bankAccount": {
             "accountNickName": "Johns UK Account",
             "accountCurrency": "GBP",
             "accountNumber": "987654321",
             "accountType1": "personal",
             "accountType2": "checking",
             "bankName": "HSBC",
             "bankCode": "40-30-20",
             "bankCountry": "GB",
             "swiftCode": "HBUKGB4B",
             "branchAddress": "1 Queens Road, Central London",
             "beneficiaryFirstName": "John",
             "beneficiaryLastName": "Doe",
             "beneficiaryDateOfBirth": "1990-01-01",
             "beneficiaryGovernmentID": "987654321",
             "beneficiaryCountry": "GB",
             "beneficiaryAddress1": "123 King St",
             "beneficiaryState": "England",
             "beneficiaryCity": "London",
             "beneficiaryZipCode": "SW1A 1AA"
         }
     }'
{
"isSuccess": true,
"message": "Transfer created successfully",
"statusCode": "NO_ERROR",
"logIdentifier": "abc123def456",
"data": {
"token": "trans789token",
"dateCreated": "2024-07-09T16:17:00.548Z",
"dateUpdated": "2024-07-09T16:17:00.548Z",
"statusId": 1,
"status": "CREATED",
"fxRate": 1.05,
"beneficiaryFee": 2.50,
"merchantFee": 1.00,
"senderToken": "f1e2d3c4-b5a6-7890-abcd-ef1234567890"
}
}Monitor Transfer Status
After creating a transfer, there are two ways to track its progress:
Option A: Transfer Reports (Recommended)
Use the Get Transfers Report endpoint to retrieve the status and details of your transfers on demand. This is the primary way to check on transfers, especially when processing multiple payments and you need to review statuses in bulk. You can filter results by beneficiary, status, date range, currency, and more. The maximum pageSize is 100 records per request.
Option B: Webhook Notifications
For real-time updates without polling the API, subscribe to webhook events. We recommend the following events:
TRANSFER.CREATED: triggers when a transfer is created, confirming the payout was initiated.TRANSFER.STATUS.UPDATED: triggers when the transfer status changes (e.g.,PROCESSING,APPROVED,DECLINED,CANCELLED,ON_HOLD,SETTLED).
Transfers placed on ON_HOLD may include sub-statuses with additional detail.
To start receiving webhook notifications, follow the How to Set Up Webhooks guide. For a full list of available events and example payloads, see Webhook Events.
Other Available Payout Methods
Follow the links below to learn more about other available payout methods:
Updated 14 days ago