Beneficiary Registration
i-payout's batch processing feature enables efficient bulk beneficiary registration. Merchants can compile a batch file with records for each beneficiary they wish to register, facilitating mass operations.
Step 1: Download Example File
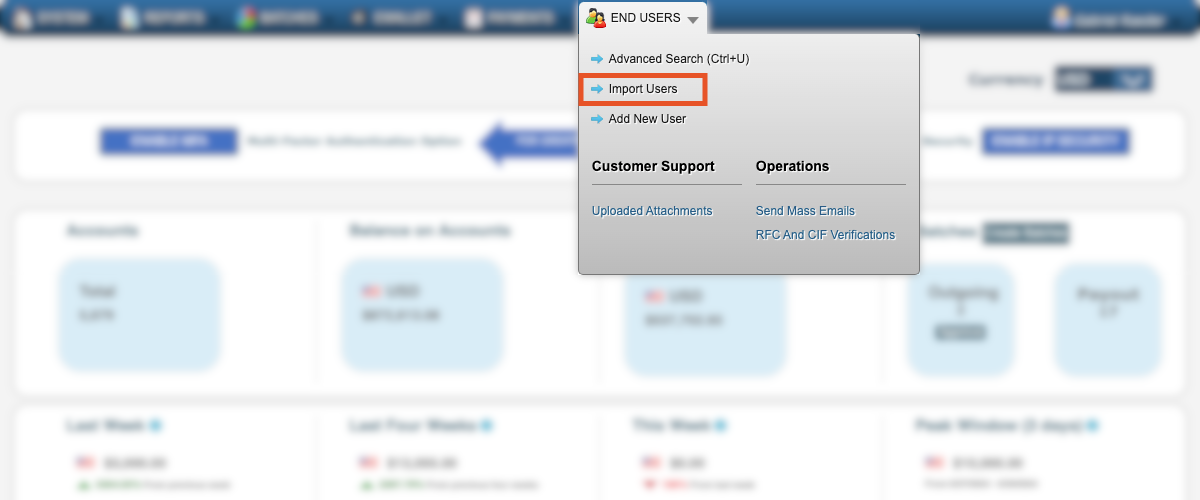
From i-payout's main page, hover over the End Users menu and click Import Users.

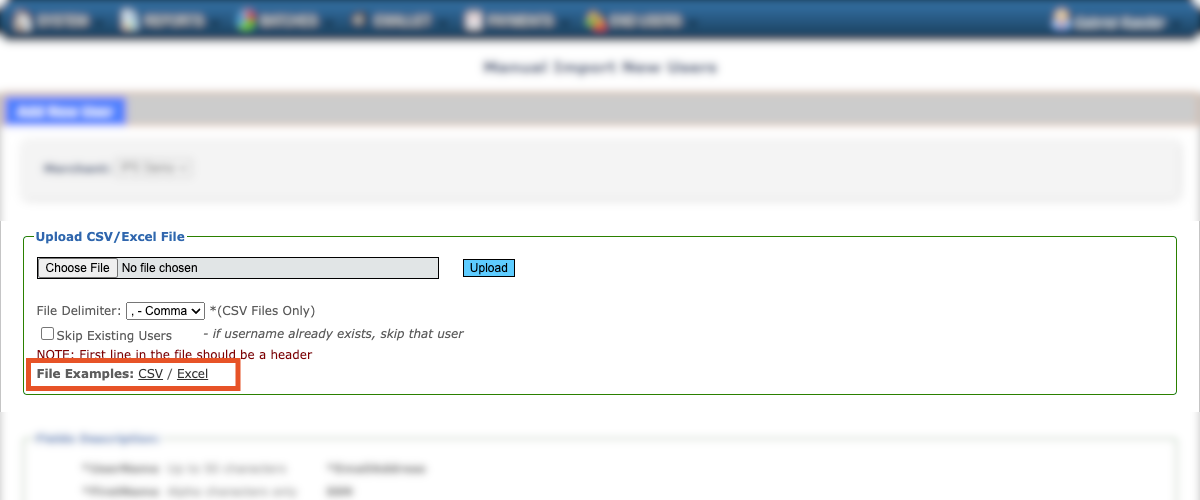
In the Import Users screen, you can find example files in CSV and Excel format. To download the file in your preferred format, click the links on the admin portal or click the links here for CSV or Excel.
The supported file formats are:
- CSV (Comma-Separated Values)
- XLSX (Microsoft Excel Open XML Spreadsheet)

Step 2: Fill in the Information
Batch File Structure
The files submitted must adhere to a specific structure to ensure proper processing:
- Header Row: The first row must contain field names as specified in the documentation.
- Data Rows: Following the header, each row represents a customer record to be registered.
Record Format
The format for customer registration records is detailed below.
| Field Name | Description | Data Type | Required |
|---|---|---|---|
| UserName | Unique username for the customer | String | Yes |
| FirstName | Customer's first name | String | Yes |
| LastName | Customer's last name | String | Yes |
| CompanyName | Name of the customer's company (if applicable) | String | No |
| Address1 | Primary street address | String | No |
| Address2 | Secondary street address (if any) | String | No |
| City | City of residence | String | No |
| State | State of residence | String | No |
| ZipCode | Postal code | String | No |
| Country2xFormat | Two-letter country code | String | No |
| PhoneNumber | Primary phone number | String | No |
| CellPhoneNumber | Mobile phone number | String | No |
| EmailAddress | Primary email address | String | No |
| SSN | Social Security Number (if applicable) | String | No |
| CompanyTaxID | Tax identification number for the company | String | No |
| GovernmentID | Government-issued identification number | String | No |
| MilitaryID | Military identification number (if applicable) | String | No |
| PassportNumber | Passport number | String | No |
| DriversLicense | Driver's license number | String | No |
| DateOfBirth | Customer's date of birth | Date | No |
| WebsitePassword | Password for website access | String | No |
| DefaultCurrency | Preferred currency for transactions | String | No |
| PreferredLanguage | Preferred language for communications | String | No |
| SecondaryEmailAddress | Secondary email address (if any) | String | No |
| skipAutoSvcOrder | Indicates if automatic service orders should be skipped | Boolean | No |
| isBusinessUser | Indicates if the user is a business user | Boolean | No |
| businessUsername | Username for business users (if applicable) | String | No |
| secondaryEmail | An additional email address | String | No |
Step 3: Submit File
To create beneficiaries, you must submit the file with the beneficiaries' information.
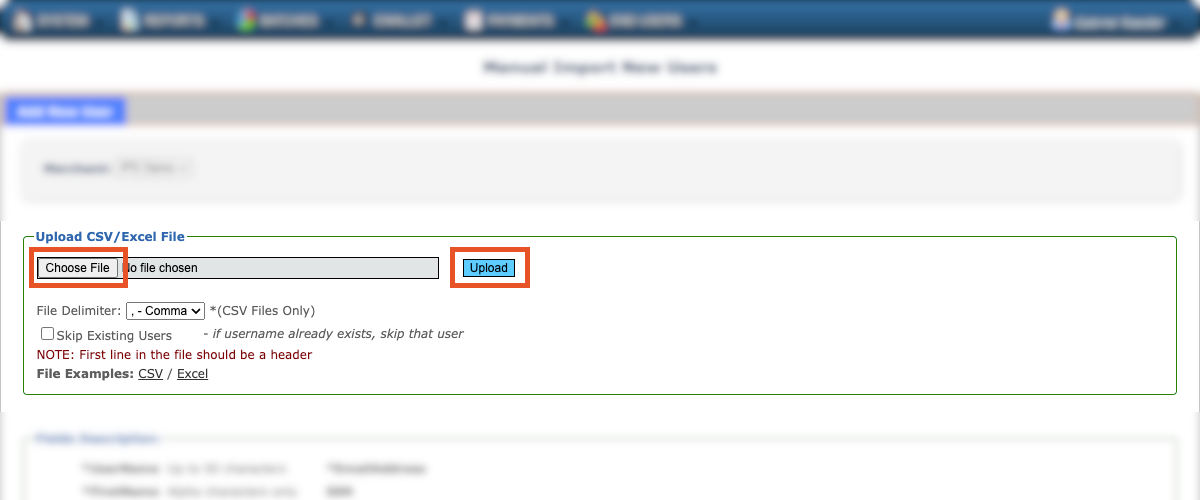
- Hover the mouse over the End Users menu and click Import Users. Click Choose File, select the file with the information of the beneficiaries you want to register and click Upload.

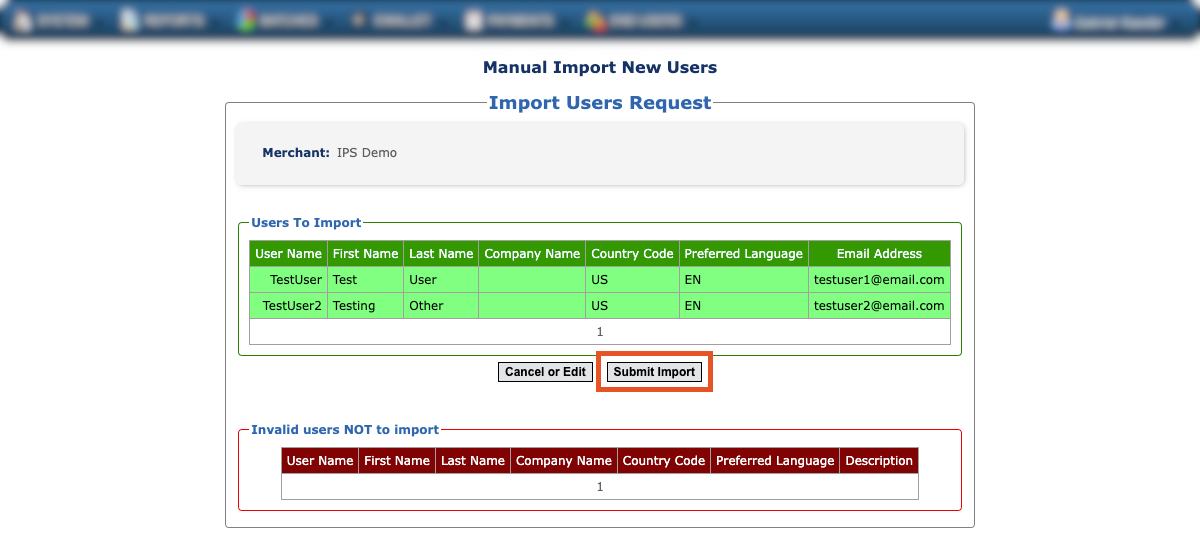
- Check that all beneficiaries appear in the Users to Import table. Beneficiaries who appear in the Invalid users NOT to import table will not be imported, and their information should be corrected. Once all beneficiaries appear in the correct table, click Submit Import.

Updated 5 months ago