
How to Set Up Merchant API Credentials
Before you can make API calls, you need to generate your credentials and whitelist your server IPs from the Admin Portal.
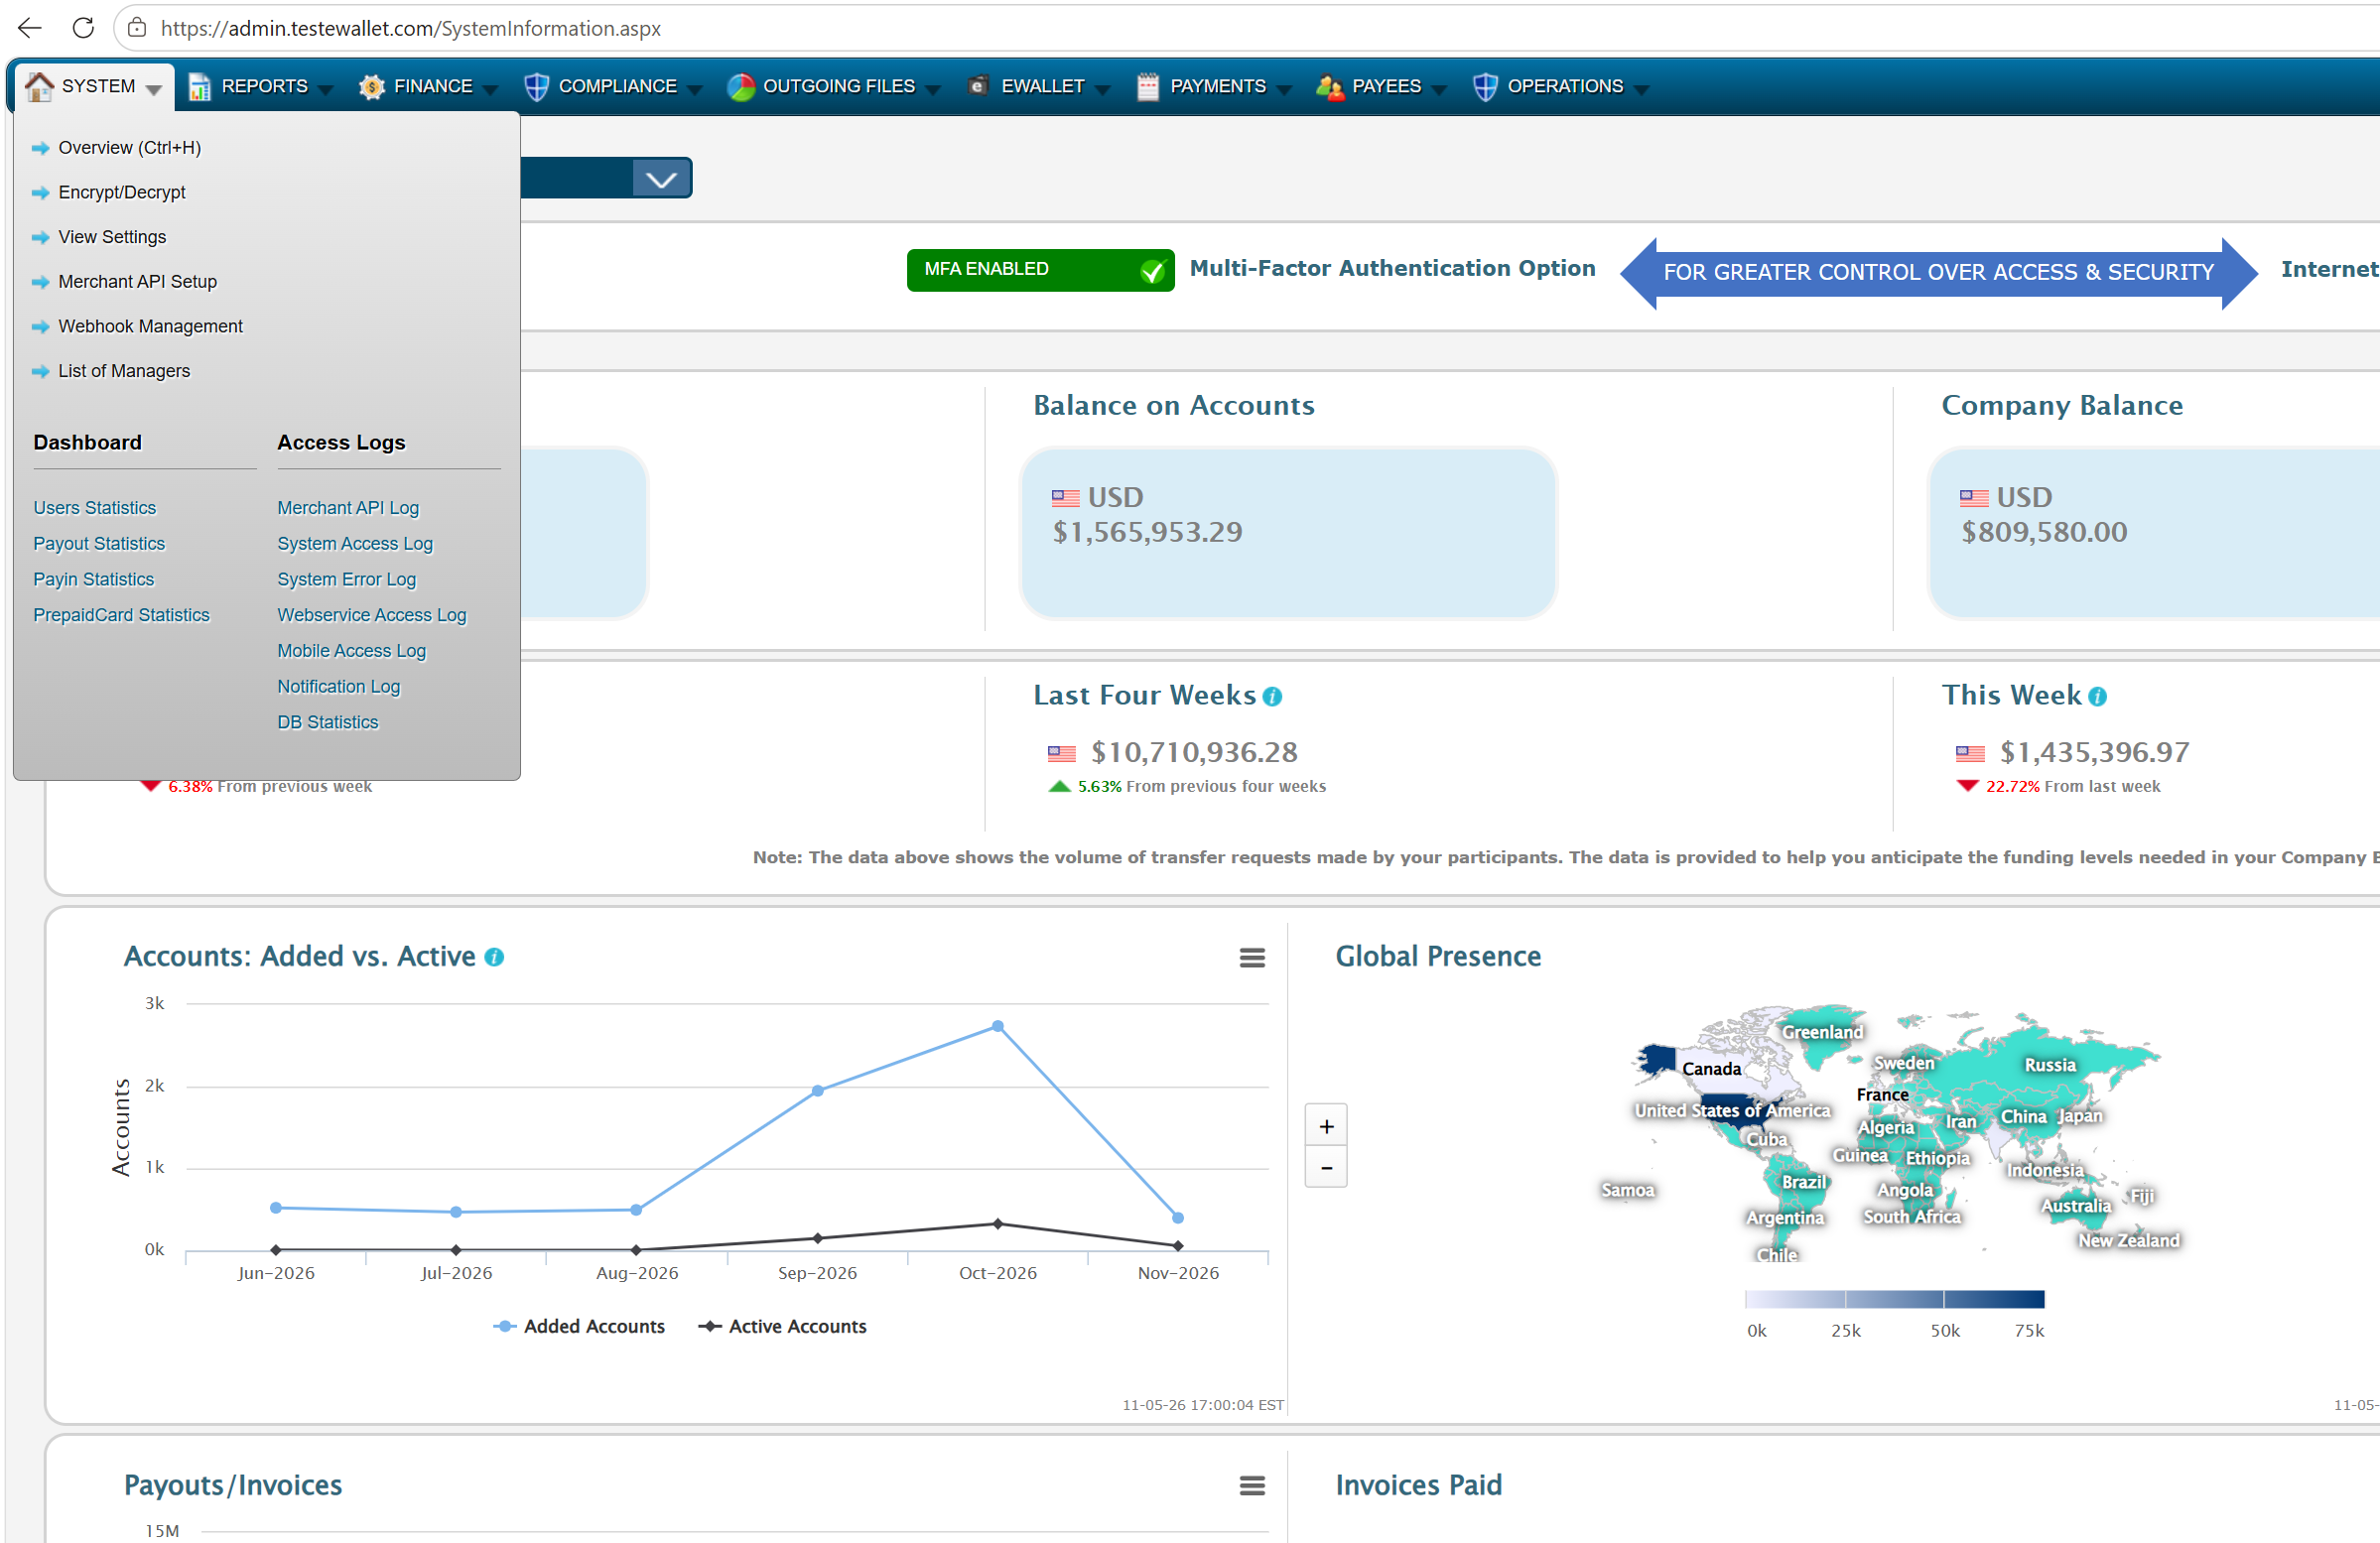
Step 1: Navigate to Merchant API Setup
In the Admin Portal, go to System → Merchant API Setup.
Step 2: Generate your credentials
Enter your authenticator code (already set up if you followed the Admin Account Setup guide) and click SetUp Credential.
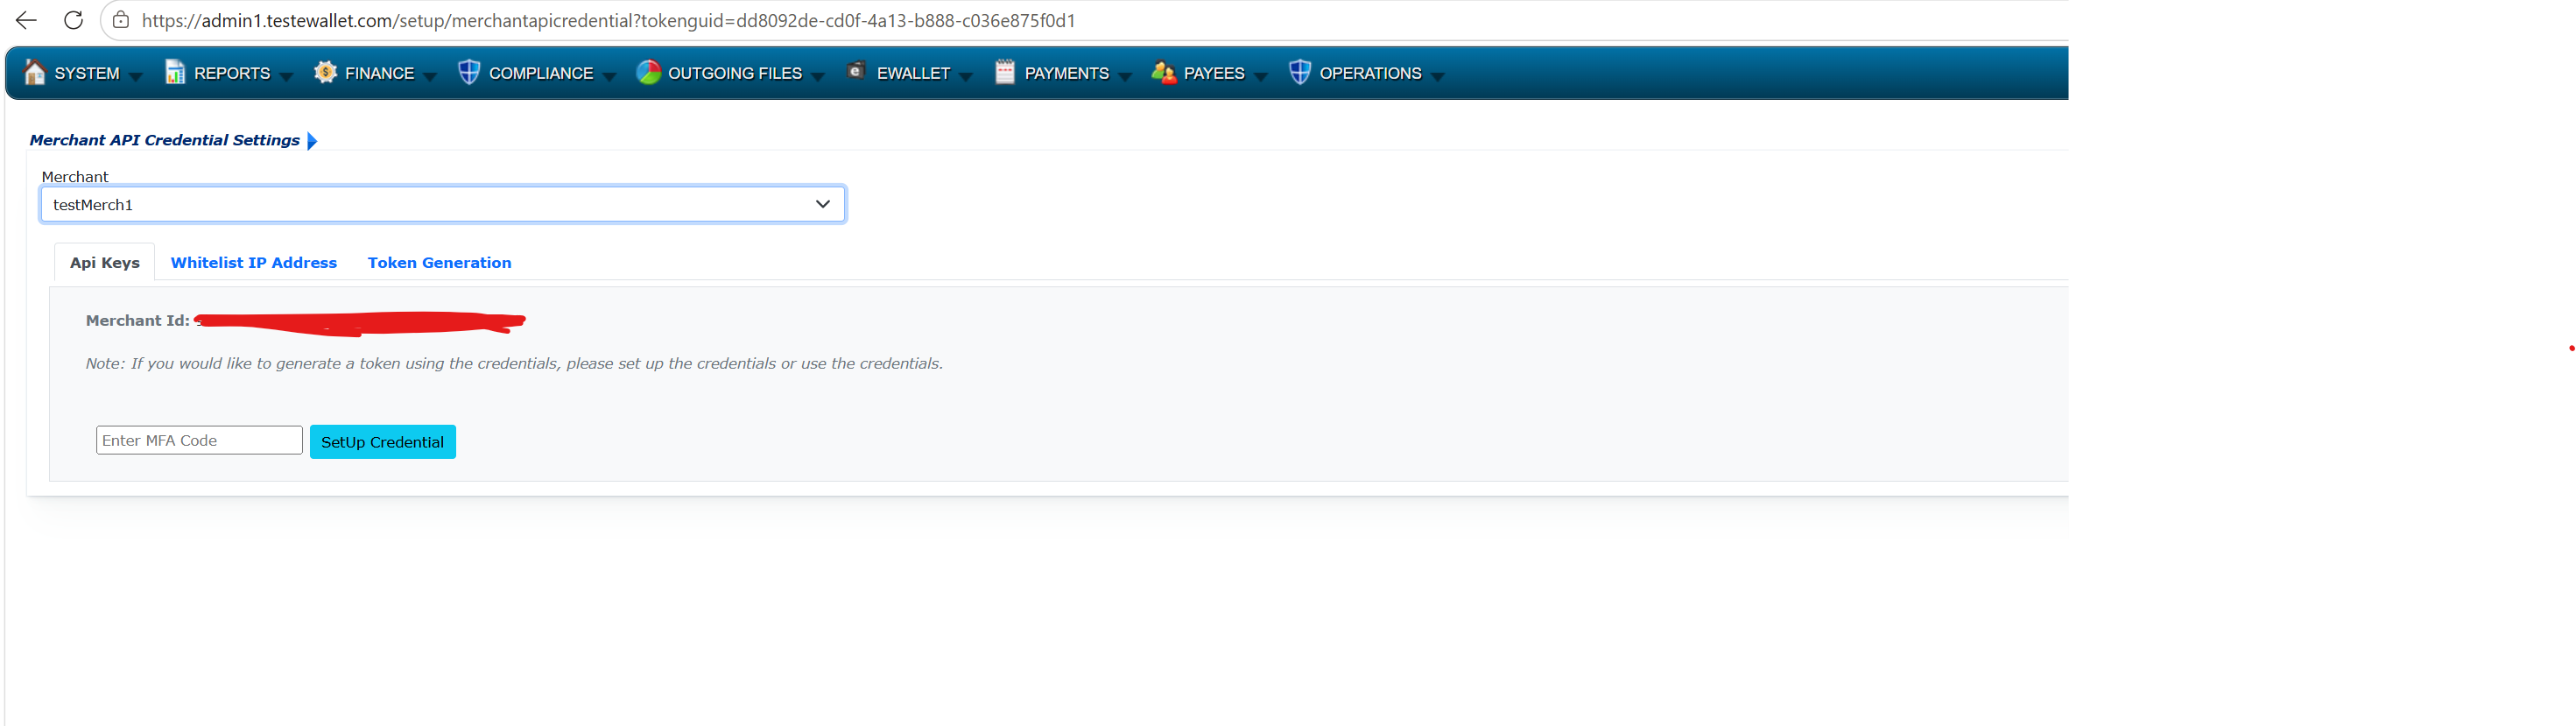
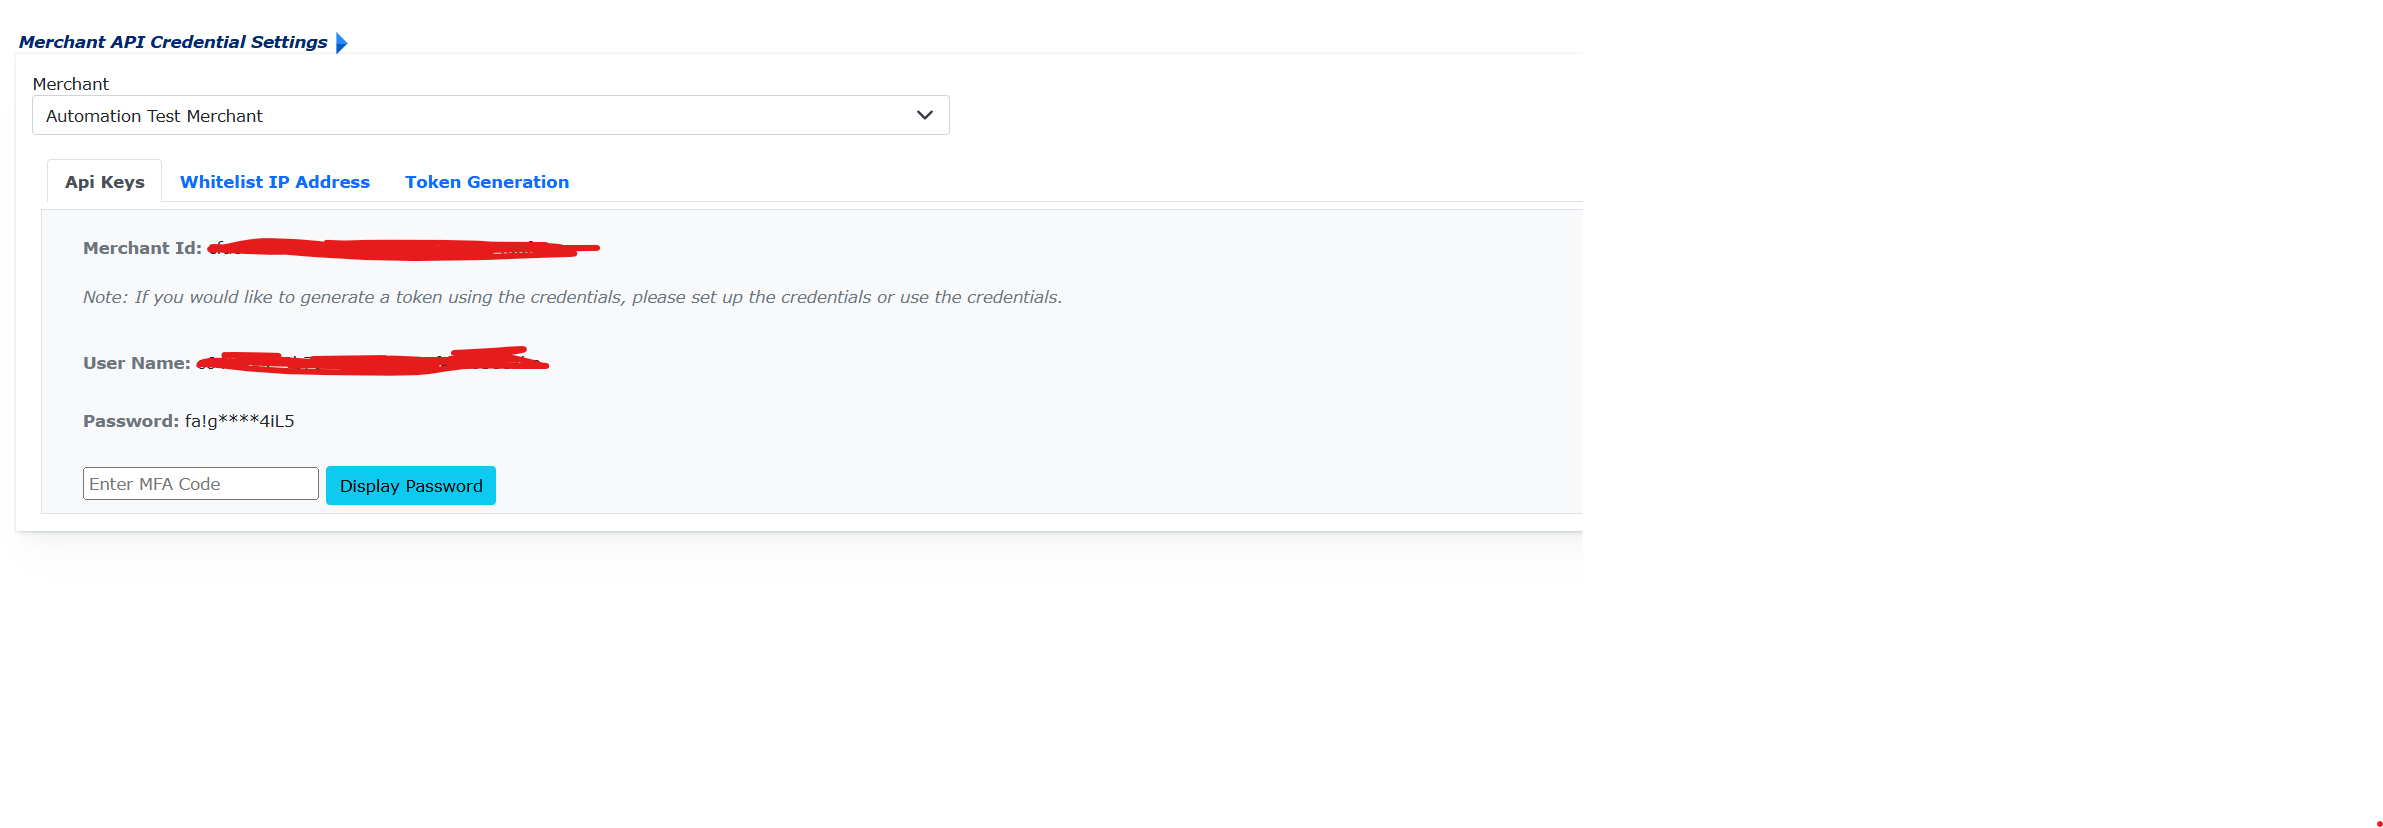
This generates three values:
- Merchant Id — This is your
X-MerchantIdheader value. You must include it in every API request. - User Name — Your API username, used for Basic Auth when fetching a JWT token from the
/authentication/loginendpoint. - Password — Your API password, used alongside the username for Basic Auth. Click Display Password and enter your MFA code to reveal it.
Store these credentials securelyThe Merchant Id, API username, and password are used to authenticate all API requests. The username and password are sent as Basic Auth HTTP headers to the
/authentication/loginendpoint, which returns a dynamic JWT token for subsequent calls.
Step 3: Whitelist your IP addresses
Click the Whitelist IP Address tab. All API requests from non-whitelisted IPs will fail with an "IP Validation" error, so this step is critical.

Enter your server's IP address, select the appropriate subnet mask from the dropdown, enter your MFA code, and click Add.
For sandbox (admin.testewallet.com): We recommend whitelisting all IPs to simplify testing. Add IP 0.0.0.0 with subnet mask 255.255.255.0.
Production IP whitelistingOn the production admin portal (
admin.i-payout.com), only whitelist your real server IPs. We strongly recommend not whitelisting0.0.0.0/24(all IPs) in production, as this removes an important layer of security.
Updated about 15 hours ago